
I’ve enjoyed many apple pies over the years, but I always struggled to get my crust just right. My neighbor’s Granny Smith Apple Pie Recipe changed everything for me. The filling is perfectly tart and balanced, while the crust holds its shape without getting soggy. In this article, I’ll guide you through every step so you can make a fantastic pie too.
Why You’ll Love This Recipe
- Perfectly Tart Flavor — Using Granny Smith apples gives this pie a refreshing tang that pairs beautifully with the sweetness of sugar.
- Flaky, Crisp Crust — Follow my tips to achieve a crust that stays crisp even after baking, avoiding the dreaded soggy bottom.
- Easy Prep Steps — With straightforward instructions and easy-to-find ingredients, you’ll have your pie ready in no time.
- Customizable Toppings — Feel free to add extra spices or toppings like ice cream or whipped cream for serving.
- Impressive Presentation — A beautifully baked pie looks great on any table and makes for a lovely centerpiece.
Ingredients You’ll Need
Main Ingredients:
Granny Smith Apple Pie Recipe
- 2 (9-inch) pie shells — Store-bought or homemade works well; choose what fits your schedule.
- 7 large granny smith apples, peeled, cored, cut in 1/2-inch slices — These apples provide a perfect balance of tartness and texture.
- 1/2 cup white sugar — Adds sweetness to balance the tartness of the apples.
- 1/2 cup lightly packed brown sugar — Gives depth of flavor with its molasses notes.
- 2 tbsp all-purpose flour — Helps thicken the filling as it bakes, preventing a watery pie.
- 1 tsp ground cinnamon — Adds warmth and complements the apple flavor nicely.
- 1/8 tsp ground nutmeg — A pinch enhances the overall spice profile without overpowering it.
- 1 tbsp lemon juice — Brightens up the flavors and helps prevent browning of the apples.
- Zest from 1/2 a lemon — Adds an extra layer of fresh citrus aroma and flavor.
- 1 large egg, beaten (for egg wash) — Gives the crust a golden color when baked.
- 2 tbsp sanding sugar, if desired — Optional sprinkle for added crunch and sweetness on top.
Smart Substitutions:
- Instead of white sugar: Use coconut sugar — this will give your filling a slightly caramel flavor but may darken it more than regular sugar does.
- Instead of all-purpose flour: Try cornstarch — it thickens well but requires less compared to flour (about half).
Pro Tip:
Choose Granny Smith apples that are firm and feel heavy for their size. This ensures they hold their shape during baking rather than turning mushy.
How to Make Granny Smith Apple Pie Recipe
Quick Prep Checklist:
* Prepare your pie shells ahead of time—chill them if possible for better flakiness.
* Have all ingredients ready before starting to streamline your process.
Step 1: Prepare Your Apples
Start by peeling and slicing your apples into even 1/2-inch slices. They should look uniform so they cook evenly. This step is crucial because uneven sizes can lead to parts being undercooked or mushy later on.
Tip: To keep sliced apples from browning while you prep other ingredients, toss them with lemon juice immediately after cutting.
Step 2: Mix Filling Ingredients
In a large bowl, combine sliced apples with white sugar, brown sugar, cinnamon, nutmeg, flour, lemon juice, and lemon zest. Toss everything gently until well coated; you want each slice covered in sweet goodness.
Watch For: The mixture should be slightly sticky but not overly wet; excess moisture can create a soggy bottom crust.
Step 3: Assemble Your Pie
Place one pie shell in a deep-dish pan and fill it with your apple mixture evenly. Ensure there are no big gaps—this helps avoid shrinkage during baking. Cover with another pie shell; crimp edges together using your fingers or fork to seal tightly.
You’ll Know It’s Ready When: You see some filling bubbling slightly at the edges before baking; this indicates that it’s packed well inside.
Step 4: Apply Egg Wash & Sugar
Use a pastry brush to apply beaten egg across the top crust evenly; this gives it that beautiful golden finish. Sprinkle sanding sugar over the top if you’d like an extra sweet crunch after baking.
Don’t skip this step! It adds both flavor and visual appeal to your pie.
Step 5: Bake
Preheat your oven to 425°F (220°C). Place your assembled pie on a lined baking sheet (to catch any drips) and bake for about 45–50 minutes until golden brown on top. Keep an eye on it towards the end!
If it starts browning too quickly before cooking through (an indicator could be excessive bubbling), cover loosely with foil.
✅ Perfect Results Checklist:
* Golden brown crust
* Filling bubbling gently out from slits in crust
* Aroma of warm spices wafting through your kitchen
Expert Tips & Variations
3 Pro Tips:
* Chill Your Dough: If making dough from scratch, chill before rolling for easier handling—this keeps butter solid which leads to flakier layers.
* Don’t Overmix Filling: Tossing too much can break down apple slices; you want them intact for texture contrast against soft filling.
* Let It Cool: Allowing your pie at room temperature before slicing ensures cleaner cuts—cutting too soon results in runny filling.
3 Variations to Try:
* Dutch Apple Pie: Add streusel topping made from oats instead of covering fully with dough—it adds delightful crunch!
* Caramel Apple Pie: Drizzle store-bought caramel sauce over filled apples before sealing—this creates pockets of gooey sweetness throughout!
* Spiced Rum Variation: Use spiced fruit juice instead of lemon juice for added complexity—perfect if you’re looking for something different!
Common Mistakes to Avoid
Mistake #1: Soggy Bottom Crust
A soggy bottom crust usually occurs when juices leak out during baking due to unevenly sized apple pieces or excess moisture in the filling. To avoid this issue, keep apple slices uniform in size and limit moisture by using just enough flour mixed into fillings without oversaturating them.
Mistake #2: Overcooked Apples
Overcooking causes apples to turn mushy rather than maintain their shape—the result is an unappealing texture when cut into slices afterward! Prevent this by checking tenderness halfway through cooking time; adjust timing accordingly based on how firm you prefer them post-baking.
Mistake #3: Not Letting It Cool
Cutting straight into freshly baked pies means running into hot juices spilling everywhere—a messy situation! Always let pies cool completely at room temperature (around an hour) before slicing up; patience pays off here!
Storage & Reheating
Room Temperature: Store leftover slices covered at room temperature for up to two days maximum where they’ll remain enjoyable yet best consumed fresh!
Refrigerator: Wrap tightly in plastic wrap or place inside an airtight container—lasts about four days chilled without losing quality!
Freezer: Wrap individual slices securely in aluminum foil followed by freezer-safe bags—they freeze well up three months long!
Reheating:
* Oven: Preheat oven at 350°F (175°C) then bake slice(s) wrapped in foil about 15 minutes until warmed through restores freshness!
* Microwave: Heat at medium power level intervals of one minute watching closely so edges don’t become chewy while warming center back up!
* Stovetop: Place slice(s) into skillet over low heat covered using lid allowing steam retention keeps pastry crispiness intact during reheats!
Frequently Asked Questions
How do I know when my pie is done?
Your batch is done when it’s golden brown on top and bubbling around the edges—a good indicator that both crusts are cooked properly along with filling consistency achieved!
Can I use other types of apples?
Absolutely! While Granny Smith offers great tartness—you could substitute Honeycrisp or Fuji for sweeter options though adjusting sugars may be necessary based upon their natural sweetness levels!
Should I peel my apples?
Yes! Peeling ensures smoother textures throughout once baked as skins tend not break down adequately creating chewiness instead—which isn’t ideal here!
What’s best served alongside this recipe?
Serving warm slices topped with vanilla ice cream or whipped cream enhances flavors perfectly while adding delightful contrast between warm apple spice versus creamy coldness creating lovely balance enjoyed visually too!
Final Thoughts
If you’re craving something classic yet deliciously comforting like homemade apple pie, making this recipe will meet those needs perfectly. The combination of tart Granny Smith apples along with flaky crust makes every bite worth savoring deeply.
Feel free share thoughts below as you try out my Granny Smith Apple Pie Recipe—I’d love reading each experience shared! Rate ⭐⭐⭐⭐⭐ too plus invite friends wanting dessert inspiration they might just love helping share memories together around dinner tables across homes everywhere!
Granny Smith Apple Pie Recipe
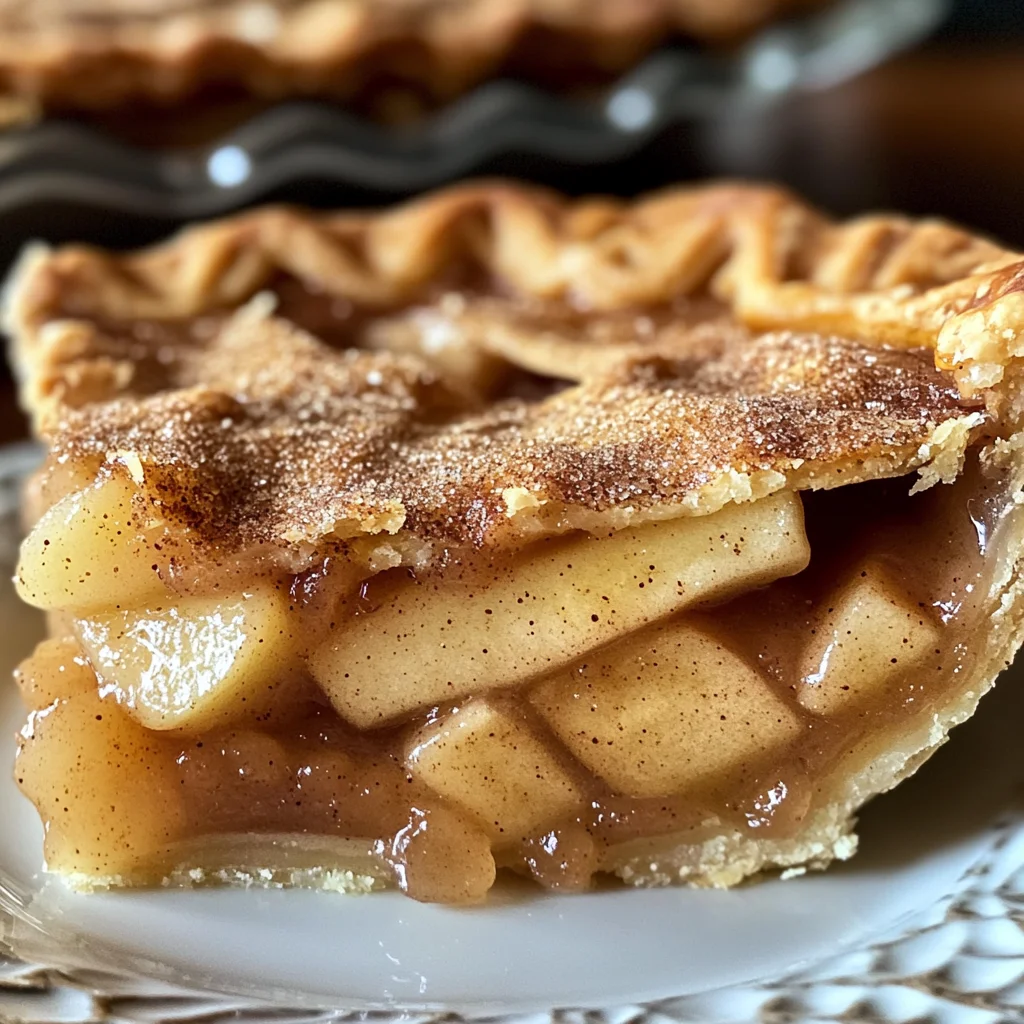
Indulge in the delightful aroma of freshly baked Granny Smith Apple Pie, where the tartness of the apples harmonizes beautifully with the sweetness of sugar. Each slice reveals a perfectly flaky crust that offers a satisfying crunch, while the warm filling bursts with flavor. Serve it warm for a comforting dessert experience, and feel free to customize with your favorite toppings like ice cream or whipped cream.
- Total Time: 1 hour 20 minutes
- Yield: 8 servings
Ingredients
- 2 (9-inch) pie shells
- 7 large Granny Smith apples, peeled, cored, cut in 1/2-inch slices
- 1/2 cup white sugar
- 1/2 cup lightly packed brown sugar
- 2 tbsp all-purpose flour
- 1 tsp ground cinnamon
- 1/8 tsp ground nutmeg
- 1 tbsp lemon juice
- Zest from 1/2 a lemon
- 1 large egg, beaten (for egg wash)
- 2 tbsp sanding sugar (if desired)
Instructions
- Preheat your oven to 425°F (220°C) and prepare your pie shells by chilling them for better flakiness.
- Peel and slice the apples into uniform 1/2-inch pieces to ensure even cooking; toss them with lemon juice to prevent browning.
- In a large bowl, combine sliced apples with white sugar, brown sugar, flour, cinnamon, nutmeg, lemon juice, and lemon zest. Gently mix until the apples are well coated.
- Place one pie shell in a deep-dish pan and fill it evenly with the apple mixture; cover with another pie shell and crimp the edges to seal tightly.
- Brush the top crust with beaten egg for a golden finish and sprinkle sanding sugar on top if desired for added crunch.
- Bake on a lined baking sheet for 45–50 minutes until golden brown and bubbling slightly at the edges; cover loosely with foil if browning too quickly.
- Prep Time: 30 minutes
- Cook Time: 50 minutes
- Category: Dessert
- Method: Baking
- Cuisine: American