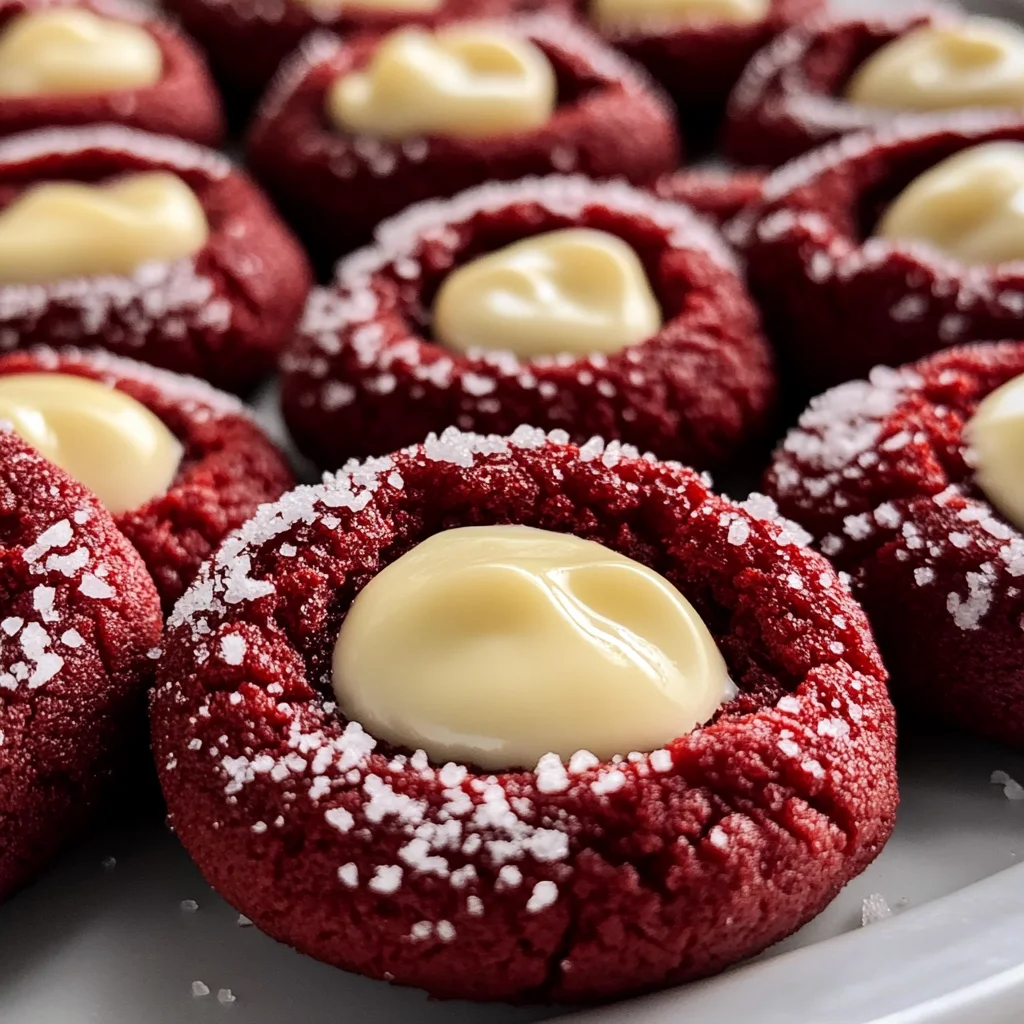
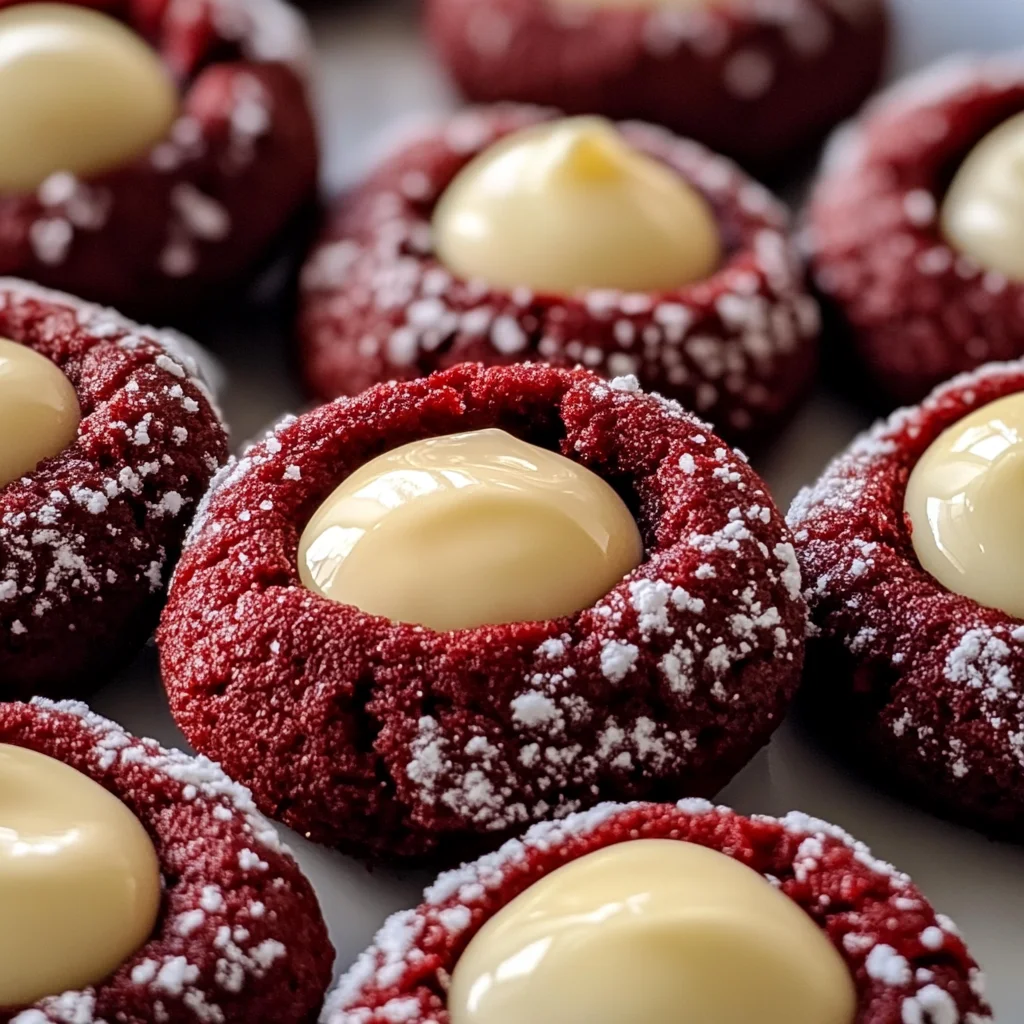
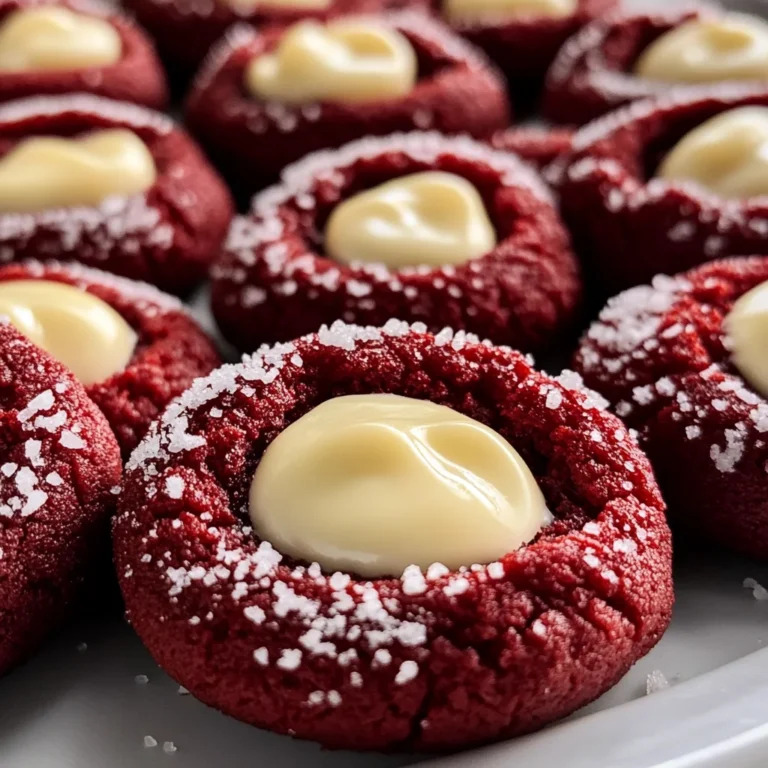
These Red Velvet Cream Cheese Thumbprint Cookies A Festive Twist On A Classic are a stunning addition to any dessert table. Their vibrant red color and tangy cream cheese filling make them perfect for celebrations, holidays, or just a delightful treat at home. Each cookie combines rich cocoa flavor with a creamy center, ensuring they stand out at any gathering.
Why You’ll Love This Recipe
- Eye-catching Appeal: The striking crimson hue of these cookies makes them visually stunning.
- Delicious Flavor Combination: Rich cocoa and tangy cream cheese create a unique taste experience.
- Versatile Treat: Perfect for holidays, parties, or casual gatherings.
- Easy to Make: With clear steps and simple ingredients, anyone can bake these cookies.
- Fun to Decorate: Customize with additional powdered sugar or melted white chocolate for an elegant finish.
Tools and Preparation
Before you start baking these delightful cookies, gather the necessary tools and equipment for a smooth process.
Essential Tools and Equipment
- Stand mixer
- Mixing bowls
- Measuring cups and spoons
- Parchment paper or silicone baking mats
- Cookie scoop
- Piping bag (or Ziploc bag)
Importance of Each Tool
- Stand mixer: Makes creaming butter and sugar effortless, ensuring a fluffy texture.
- Parchment paper: Prevents sticking, allowing for easy cookie removal from baking sheets.
- Cookie scoop: Ensures uniform cookie sizes for even baking.
Ingredients
For the Cookies
- 2 ½ cups (300g) all-purpose flour
- 2 tablespoons (14g) unsweetened natural cocoa powder
- 1 teaspoon baking soda
- ½ teaspoon salt
- 1 cup (226g) unsalted butter, softened
- 1 ½ cups (300g) granulated sugar
- 1 large egg, room temperature
- 1 teaspoon vanilla extract
- 1 tablespoon (15ml) white vinegar
- ½ cup (120ml) buttermilk (or make your own)
- 1-2 ounces (30-60ml) red gel food coloring
For the Cream Cheese Filling
- 8 ounces (226g) full-fat cream cheese, softened
- ½ cup (113g) unsalted butter, softened
- 3-4 cups (360-480g) powdered sugar, sifted
- 1 teaspoon vanilla extract
- Pinch of salt
Optional Garnishes
- Additional powdered sugar for dusting
- Melted white chocolate for drizzling
How to Make Red Velvet Cream Cheese Thumbprint Cookies A Festive Twist On A Classic
Step 1: Preheat the Oven
Preheat your oven to 375°F (190°C). Prepare several baking sheets by lining them with parchment paper or silicone baking mats.
Step 2: Mix Dry Ingredients
In a medium bowl, whisk together:
1. All-purpose flour
2. Cocoa powder
3. Baking soda
4. Salt
Set this mixture aside for later use.
Step 3: Cream Butter and Sugar
In a stand mixer, combine:
1. Softened butter
2. Granulated sugar
Cream on medium-high speed for 3-5 minutes until light and fluffy.
Step 4: Add Wet Ingredients
Add the following ingredients to the creamed mixture:
1. Egg
2. Vanilla extract
3. White vinegar
Beat on medium speed until just combined, scraping down the sides of the bowl as needed.
Step 5: Add Food Coloring
Mix in 1-2 ounces of red gel food coloring until the dough achieves a vibrant red hue.
Step 6: Combine Wet and Dry Mixtures
Gradually add the dry mixture in three additions while alternating with two additions of buttermilk. Mix on low speed only until flour streaks disappear to avoid overmixing.
Step 7: Chill Dough
Scrape the dough into a ball and cover it tightly with plastic wrap. Refrigerate for at least 30 minutes or up to 2 hours.
Step 8: Prepare Cream Cheese Filling Base
In a clean stand mixer bowl, beat together:
1. Softened cream cheese
2. Unsalted butter
Mix on medium speed for about 2-3 minutes until smooth and creamy. Scrape down the bowl frequently.
Step 9: Add Powdered Sugar
Gradually incorporate sifted powdered sugar one cup at a time while mixing on low speed until combined. Increase speed to medium-high and beat for another 2-3 minutes until fluffy.
Step 10: Flavor Filling
Stir in:
1. Vanilla extract
2. A pinch of salt
Ensure everything is perfectly blended together.
Step 11: Prepare Filling for Piping
Transfer the cream cheese filling into a piping bag fitted with a small round tip or use a Ziploc bag with a snipped corner. Refrigerate for about 15-20 minutes if needed to firm up.
Step 12: Form Cookie Balls
Remove chilled dough from the refrigerator. Using a cookie scoop or your hands, form uniform balls approximately the size of 1.5 tablespoons each and place them on prepared baking sheets about 2 inches apart.
Step 13: Create Thumbprints
Gently press an indentation into each dough ball using your thumb or the back of a rounded measuring spoon.
Step 14: Fill Cookies
Using your piping bag or spoon, carefully dollop cream cheese filling into each indentation made in the cookies.
Step 15: Bake Cookies
Bake cookies for approximately 10-12 minutes at 375°F (190°C), until edges are set and filling appears slightly puffed.
Step 16: Initial Cooling
Remove cookies from the oven and allow them to cool on baking sheets for about 5-7 minutes before transferring them gently to a wire rack.
Step 17: Complete Cooling
Let cookies cool completely on wire racks; this is crucial for allowing the cream cheese filling to fully set.
Step 18: Garnish (Optional)
Once cooled, you can dust lightly with additional powdered sugar or drizzle melted white chocolate over the top for an elegant touch.
Step 19: Store Cookies
Store these delightful treats in an airtight container in the refrigerator for up to five days due to their cream cheese filling; they can also be frozen for up to three months—separating layers with parchment paper—thaw at room temperature before enjoying!
How to Serve Red Velvet Cream Cheese Thumbprint Cookies A Festive Twist On A Classic
Red Velvet Cream Cheese Thumbprint Cookies are not just a treat; they are a delightful centerpiece for any gathering. These cookies can be served in various ways to enhance their appeal and flavor.
With a Dusting of Powdered Sugar
- Lightly sprinkle extra powdered sugar on top for an elegant touch that adds sweetness.
Accompanied by Fresh Berries
- Serve alongside fresh strawberries or raspberries to balance the richness with a touch of tartness and freshness.
Paired with Hot Beverages
- Enjoy these cookies with coffee, tea, or hot chocolate, as the warm drinks complement the creamy filling and rich cocoa flavor.
As Part of a Dessert Platter
- Include them on a dessert platter with other treats like brownies, mini cupcakes, or fruit tarts for an impressive dessert table.
Gift-Wrapped for Special Occasions
- Present the cookies in decorative boxes or jars as gifts during holidays or special events, making them a delightful surprise.
How to Perfect Red Velvet Cream Cheese Thumbprint Cookies A Festive Twist On A Classic
Perfecting your Red Velvet Cream Cheese Thumbprint Cookies is all about attention to detail and technique. Here are some tips to ensure they turn out beautifully every time.
-
Use Room Temperature Ingredients: Make sure your butter, cream cheese, and egg are at room temperature for better mixing and texture.
-
Don’t Overmix the Dough: Mix just until combined when adding dry ingredients to prevent tough cookies; this keeps them soft and chewy.
-
Chill the Dough: Chilling the dough helps maintain its shape while baking and enhances the flavors.
-
Check Oven Temperature: Use an oven thermometer to ensure accurate baking temperatures; this prevents underbaking or overbaking.
-
Fill Generously: Don’t skimp on the cream cheese filling! A generous dollop will create that iconic thumbprint look and delicious taste.
-
Allow Cooling Time: Let cookies cool completely before serving. This helps the cream cheese filling set properly for optimal enjoyment.
Best Side Dishes for Red Velvet Cream Cheese Thumbprint Cookies A Festive Twist On A Classic
Pairing side dishes with your Red Velvet Cream Cheese Thumbprint Cookies can elevate your dessert experience. Here are some delightful options that complement their flavors well.
-
Vanilla Ice Cream: The creamy sweetness of vanilla ice cream balances perfectly with the tangy cream cheese filling. Serve scoops alongside each cookie for a classic pairing.
-
Chocolate Mousse: This rich dessert offers a luxurious texture that pairs well with the cookie’s soft bite. Consider serving it in small cups alongside the cookies.
-
Fruit Salad: A refreshing mix of seasonal fruits adds brightness and acidity, enhancing the overall dessert experience without overwhelming sweetness.
-
Cheesecake Bites: Mini cheesecake bites offer another layer of creamy goodness that harmonizes beautifully with the red velvet theme.
-
Caramel Sauce: Drizzle warm caramel sauce over cookies for an indulgent twist that adds both flavor and visual appeal.
-
Coffee Cake: The subtle spices in coffee cake complement the cocoa notes in your cookies nicely, making for an enjoyable contrast in textures and flavors.
Common Mistakes to Avoid
When making Red Velvet Cream Cheese Thumbprint Cookies A Festive Twist On A Classic, it’s easy to make mistakes that can affect the final result. Here are some common pitfalls to be aware of:
- Skipping the Chilling Step: Not chilling your dough can lead to cookies that spread too much during baking. Make sure to refrigerate for at least 30 minutes to maintain shape.
- Overmixing the Dough: Mixing too long can cause tough cookies. Mix until just combined; stop as soon as you no longer see flour streaks.
- Not Measuring Ingredients Correctly: Using incorrect measurements can throw off the texture and flavor. Always use a kitchen scale for precise ingredient amounts.
- Ignoring Room Temperature Ingredients: Cold butter or eggs can prevent proper mixing. Ensure your butter is softened and eggs are at room temperature for the best results.
- Oven Temperature Inaccuracy: Baking at the wrong temperature can affect cooking time and doneness. Use an oven thermometer to ensure your oven is calibrated correctly.
Storage & Reheating Instructions
Refrigerator Storage
- Store cookies in an airtight container in the refrigerator.
- They will keep fresh for 3-5 days due to the cream cheese filling.
Freezing Red Velvet Cream Cheese Thumbprint Cookies A Festive Twist On A Classic
- Layer cookies between parchment paper in a freezer-safe container.
- They can be frozen for 2-3 months without losing flavor.
Reheating Red Velvet Cream Cheese Thumbprint Cookies A Festive Twist On A Classic
- Oven: Preheat your oven to 350°F (175°C). Place cookies on a baking sheet for about 5-7 minutes until warm.
- Microwave: Heat one cookie at a time in short bursts of 10-15 seconds until just warmed through.
- Stovetop: Use a skillet on low heat, covering with a lid for a couple of minutes to warm gently.
Frequently Asked Questions
What makes Red Velvet Cream Cheese Thumbprint Cookies A Festive Twist On A Classic special?
These cookies combine the rich flavor of red velvet with tangy cream cheese filling, creating a delightful treat perfect for celebrations.
Can I make these cookies gluten-free?
Yes! Substitute all-purpose flour with a gluten-free blend to accommodate dietary needs without compromising taste.
How do I achieve the best red color?
Using gel food coloring ensures vibrancy without adding too much liquid. Start with a small amount and increase as needed.
How should I store leftovers?
Store leftover cookies in an airtight container in the refrigerator for up to five days or freeze them for longer storage.
Can I customize the filling?
Absolutely! Feel free to try different flavors like lemon or chocolate by adjusting the cream cheese filling recipe.
Final Thoughts
Red Velvet Cream Cheese Thumbprint Cookies A Festive Twist On A Classic are not only visually stunning but also deliciously versatile. They make an excellent addition to any dessert table or festive gathering. Consider customizing them with different fillings or toppings to suit your taste preferences!
Red Velvet Cream Cheese Thumbprint Cookies A Festive Twist On A Classic
Red Velvet Cream Cheese Thumbprint Cookies A Festive Twist On A Classic are a delightful treat that combines the rich flavors of cocoa and a luscious cream cheese filling. Their vibrant red hue makes them a stunning addition to any dessert table, perfect for holidays, celebrations, or a sweet indulgence at home. These cookies are easy to make, allowing bakers of all skill levels to create an impressive dessert. With their unique flavor combination and customizable decorations, these cookies will surely become a favorite among your family and friends.
- Total Time: 32 minutes
- Yield: Approximately 24 cookies
Ingredients
- 2 ½ cups all-purpose flour
- 2 tablespoons unsweetened cocoa powder
- 1 teaspoon baking soda
- ½ teaspoon salt
- 1 cup unsalted butter, softened
- 1 ½ cups granulated sugar
- 1 large egg
- 1 teaspoon vanilla extract
- 1 tablespoon white vinegar
- ½ cup buttermilk
- 1-2 ounces red gel food coloring
- 8 ounces cream cheese, softened
- ½ cup unsalted butter, softened
- 3-4 cups powdered sugar, sifted
- 1 teaspoon vanilla extract
- Pinch of salt
- Optional: Additional powdered sugar for dusting, Melted white chocolate for drizzling
Instructions
- Preheat the oven to 375°F (190°C) and line baking sheets with parchment paper.
- In a bowl, whisk together flour, cocoa powder, baking soda, and salt.
- Cream softened butter and sugar until fluffy. Add the egg, vanilla extract, white vinegar, and mix well.
- Stir in red gel food coloring for desired hue.
- Gradually add the dry mixture alternating with buttermilk until just combined.
- Chill dough for at least 30 minutes.
- Form balls of dough on prepared sheets and create thumbprints in each.
- Fill each indentation with cream cheese filling before baking for about 10-12 minutes.
- Prep Time: 20 minutes
- Cook Time: 12 minutes
- Category: Dessert
- Method: Baking
- Cuisine: American