
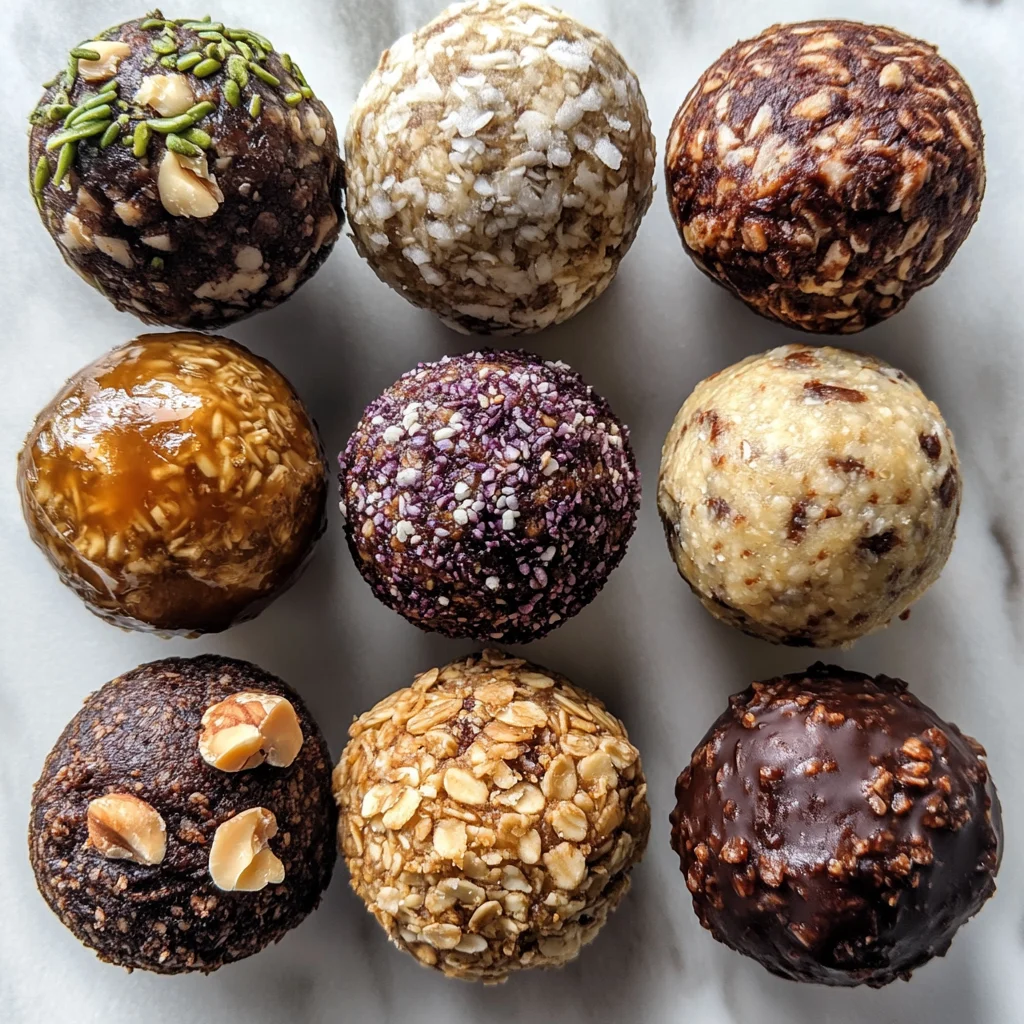
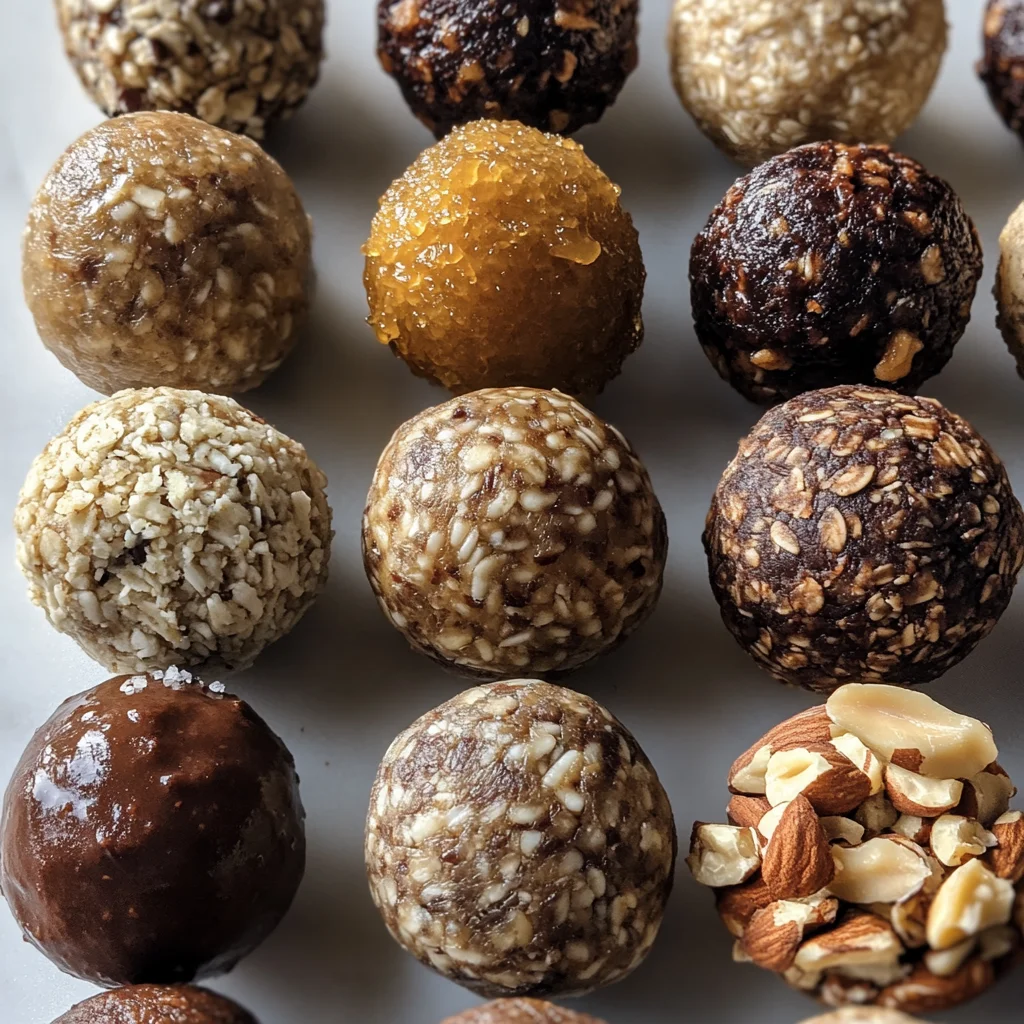
I’ve always been on the lookout for snacks that are not only easy to make but also healthy. The Best No-Bake Protein Balls — 10 Flavors, One Easy Base Recipe is my go-to solution for a quick snack or pre-workout energy boost. After some trial and error, I found the perfect balance of ingredients that yield a texture that’s thick yet manageable. In this article, you’ll learn how to whip up these protein balls in a variety of tasty flavors.
Why You’ll Love This Recipe
- Versatile base — With just five simple ingredients, you can easily customize flavors to suit your taste.
- Quick prep time — You can have these ready in 30 minutes or less, making them perfect for busy days.
- Freezer-friendly — Store them in the freezer for a quick snack whenever you need it.
- Healthy grab-and-go option — Ideal for meal prep; they pack well and are great for post-workout fuel.
- Adjustable protein content — Adding one scoop of protein powder can give you an extra 4–5 grams of protein per serving.
Ingredients You’ll Need
Main Ingredients:
The Best No-Bake Protein Balls — 10 Flavors, One Easy Base Recipe
- 1 cup rolled oats (old-fashioned)
- 2/3 cup peanut butter (or nut butter of choice)
- 1/3 cup honey or maple syrup
- 1 scoop vanilla or unflavored protein powder (optional, about 30g)
- Pinch of salt
Ingredient Notes
- Rolled oats: — Adds bulk and fiber to keep you full longer.
- Peanut butter: — Acts as the binding agent while providing healthy fats and flavor.
- Honey or maple syrup: — Natural sweeteners that help hold everything together while adding sweetness.
- Protein powder: — Boosts protein levels; optional but recommended if you’re looking to enhance nutrition.
- Salt: — Enhances all the flavors present in your batch.
Smart Substitutions:
* Instead of peanut butter: Almond butter — provides a different flavor profile while still offering healthy fats.
* Instead of honey: Agave nectar — offers a lower glycemic index option with similar sweetness.
Pro Tip: Always measure sticky ingredients like peanut butter with a liquid measuring cup. It helps keep things cleaner and ensures accurate measurements.
How to Make The Best No-Bake Protein Balls — 10 Flavors, One Easy Base Recipe
Quick Prep Checklist:
* Gather all your ingredients before starting.
* Have parchment paper ready for cooling.
Step 1: Combine Ingredients
In a large mixing bowl, combine all ingredients and stir until fully mixed. The mixture should be thick and slightly sticky—not crumbly or wet. If it’s too dry, add a teaspoon of honey; if too wet, add a tablespoon more oats.
Tip: Use a sturdy spatula to ensure everything blends well without creating lumps.
Step 2: Chill Mixture
Cover the bowl with plastic wrap and refrigerate for about 20–30 minutes. This step makes it easier to roll into balls and helps them hold their shape better once formed.
Watch For: The mixture should firm up slightly so that it holds together when you press it between your fingers.
Step 3: Roll into Balls
Remove from the fridge and roll into balls approximately one inch in diameter using your palms. Lightly damp hands will help prevent sticking during this step.
You’ll Know It’s Ready When: The balls hold their shape without crumbling apart when squeezed gently.
Step 4: Set in Fridge
Transfer the rolled balls to a parchment-lined plate or baking sheet and refrigerate for another ten minutes. This final chill allows them to set properly before storing.
Avoid overcrowding the plate; give each ball enough space so they don’t stick together.
Step 5: Store Properly
Once set, store your no-bake protein balls in an airtight container in the fridge for up to one week or freeze them for later use. These stay fresh much longer frozen!
Make sure they are completely cooled before sealing them in containers to avoid condensation forming inside.
✅ Perfect Results Checklist:
* Firmness after chilling is essential; they should not crumble when picked up.
* Texture should feel solid yet slightly chewy when bitten into.
Expert Tips & Variations
3 Pro Tips:
* Chill longer if needed: If your mixture feels too soft even after chilling, give it another ten minutes in the fridge before rolling.
* Use natural nut butters: Avoid brands with added sugars or oils—they affect both flavor and texture negatively.
* Experiment with mix-ins: Consider adding seeds like chia or flaxseed for added nutrition without changing flavor significantly.
3 Variations to Try:
* Chocolate Chip Variation: Add half a cup of dark chocolate chips—this gives your batch an extra treat while keeping things nutritious.
* Coconut Almond Flavor: Substitute almond butter instead of peanut butter and add shredded coconut for tropical flair.
* Pumpkin Spice Protein Balls: Mix in half a cup pumpkin puree along with cinnamon—perfect for fall!
Common Mistakes to Avoid
Mistake #1: Mixture is too dry
If your mixture feels dry and crumbly instead of sticky, it won’t hold together well. This often happens if there’s not enough moisture from sweeteners or nut butter. Simply add more honey or nut butter gradually until desired consistency is reached.
Mistake #2: Overcrowded cooling space
Too many protein balls on one plate lead them sticking together while they chill. When they combine during refrigeration, individual shapes can become lost. Use multiple plates if necessary; keeping distance allows proper setting without merging.
Mistake #3: Not letting them chill long enough
Skipping adequate chilling time leads to difficulty forming neat balls since warm mixtures are often too soft. Insufficient time results in misshapen snacks that don’t hold firmly upon serving later on. Make sure you allow at least twenty minutes before shaping them out!
Storage & Reheating
Room Temperature: Not ideal—keep refrigerated after making for best freshness practices.
Refrigerator: Store in an airtight container where they’ll last about one week without losing quality.
Freezer: Wrap each ball tightly individually; they’ll last up to three months frozen without damage from freezer burn!
Reheating:
* Oven: Preheat at low temperature (around 300°F) then heat briefly just until warm again—this restores softness nicely!
* Microwave: Use low power (30%); heat individually wrapped pieces within short intervals (15 seconds)—be cautious not overdo it!
Frequently Asked Questions
Can I use other types of protein powder?
Yes! You can easily substitute different flavored powders based on what’s available at home; just keep proportions similar as indicated above so texture stays consistent throughout each variation created!
How do I know when my no-bake protein balls are done?
After chilling sufficiently according steps outlined earlier above, test by gently squeezing one—it should maintain its form without crumbling apart! If successful thus far then proceed onto storage options mentioned thereafter accordingly afterward!
What’s the best way to store leftover no-bake protein balls?
For short-term storage place into airtight containers kept inside refrigerator—they’ll stay fresh around five days max! Alternatively opt freezing method which offers longer shelf life extending beyond three months’ mark altogether!
Can kids help make these?
Absolutely! These no-bake treats are fun projects suitable involving children assisting through measuring/cutting out steps taken throughout process—the only caution being supervision during knife usage if applicable occurs otherwise generally safe otherwise allowing participation shared delightfully amongst family members alike!
Final Thoughts
If you’re looking for an easy snack option that keeps well and satisfies hunger pangs effectively, you’ve found it here with this recipe! The Best No-Bake Protein Balls — 10 Flavors, One Easy Base Recipe fits perfectly into any busy lifestyle while also being flexible enough to suit various tastes.
Feel free to share your experiences below—I’d love hearing how yours turned out! Rate this recipe ⭐⭐⭐⭐⭐ if you enjoyed making these delicious bites at home!
Healthy

The Best No-Bake Protein Balls — 10 Flavors, One Easy Base Recipe
Indulge in a nutritious snack that’s easy to whip up and bursting with flavor. These no-bake protein balls are thick and chewy, with a delightful hint of sweetness that makes them irresistible. Perfect for quick energy on busy days, these bites can be customized to fit your favorite flavors and ingredients.
- Total Time: 10 minutes
- Yield: 12 servings
Ingredients
- 1 cup rolled oats
- 2/3 cup peanut butter
- 1/3 cup honey
- 1 scoop vanilla protein powder (optional, about 30g)
- Pinch of salt
Instructions
- In a large mixing bowl, combine all ingredients and stir until fully mixed. The mixture should be thick and slightly sticky.
- Cover the bowl with plastic wrap and refrigerate for about 20–30 minutes until it firms up slightly.
- Remove from the fridge and roll into balls approximately one inch in diameter using damp hands to prevent sticking.
- Transfer the rolled balls to a parchment-lined plate or baking sheet and refrigerate for another ten minutes to set properly.
- Once set, store your no-bake protein balls in an airtight container in the fridge for up to one week or freeze for later use.
- Prep Time: 10 minutes
- Cook Time: 0 minutes
- Category: Snack
- Method: No-Bake
- Cuisine: American