
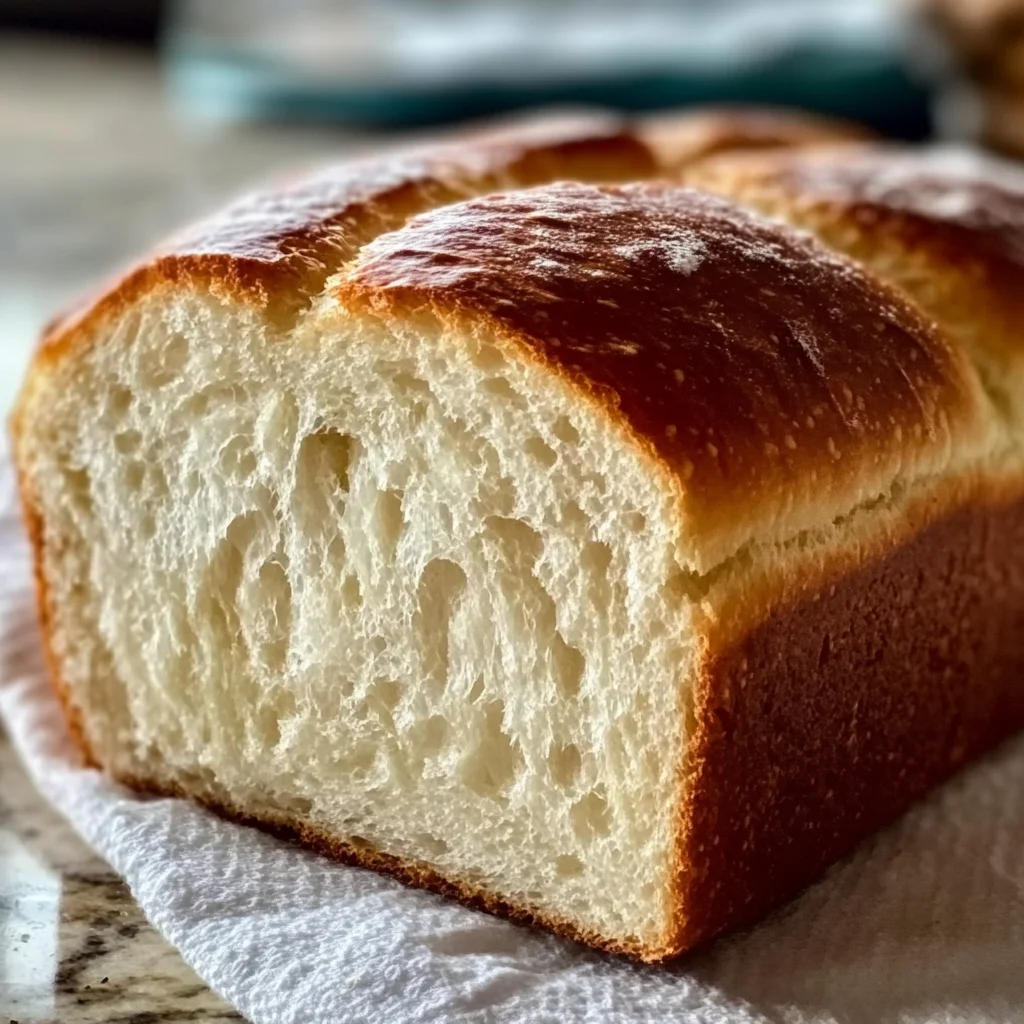
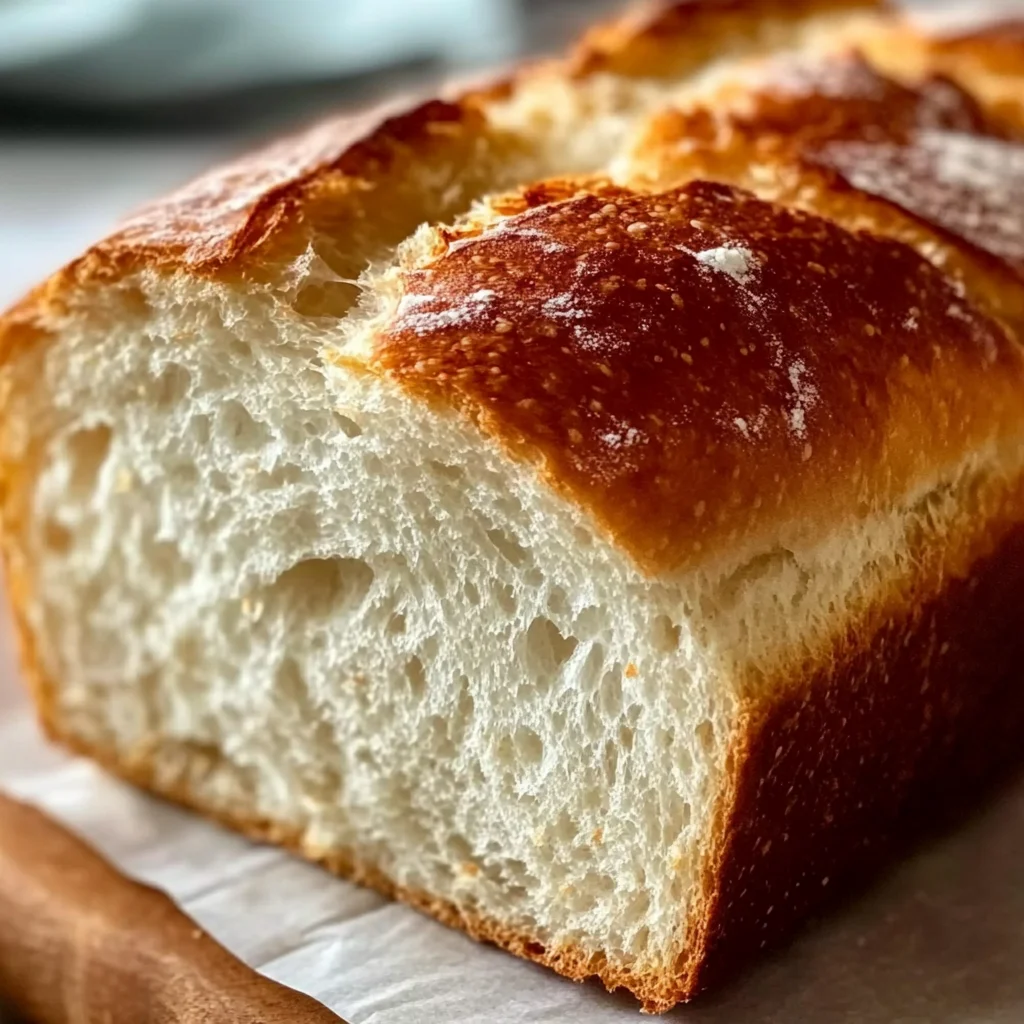
I’ve spent years perfecting my bread-making skills, and this recipe always stands out for its simplicity and reliability. Simply Sandwich Bread is the go-to choice for everyday sandwiches, toast, or even a late-night snack. After numerous attempts, I discovered the key to achieving a soft, fluffy loaf lies in the balance of ingredients and proper kneading time. In this article, you’ll find detailed instructions and helpful tips to ensure your baking experience is smooth.
Why You’ll Love This Recipe
- Soft and Fluffy Texture — This loaf produces a tender crumb that melts in your mouth.
- Perfect for Sandwiches — It slices neatly, making it ideal for all kinds of fillings.
- Easy Ingredients — You likely have everything at home already; no special trips needed.
- Versatile Uses — Perfect for toast at breakfast or hearty sandwiches at lunch.
- Make Ahead Option — Bake it now and enjoy fresh bread throughout the week.
Ingredients You’ll Need
Main Ingredients:
Simply Sandwich Bread
- 4 cups all-purpose flour
- 1 cup warm water
- 3/4 cup warm milk
- 2 1/4 teaspoons active dry yeast
- 2 tablespoons granulated sugar
- 1 1/2 teaspoons salt
- 3 tablespoons unsalted butter, softened
Smart Substitutions:
* Instead of all-purpose flour: Whole wheat flour — results in a denser loaf with more nutrients but alters texture slightly.
* Instead of unsalted butter: Coconut oil — creates a subtle flavor change while keeping the bread moist.
Pro Tip: Always check the expiration date on your yeast before starting. Fresh yeast ensures better rising and texture.
How to Make Simply Sandwich Bread
Quick Prep Checklist:
* Gather ingredients at room temperature.
* Prepare a lightly greased bowl for rising dough.
Step 1: Activate the Yeast
In a large mixing bowl, combine warm water (not hot), warm milk, granulated sugar, and active dry yeast. Allow this mixture to sit for about 5 to 10 minutes until it becomes foamy. This indicates that your yeast is alive and ready to work.
Tip: If there’s no foam after this time, start over with fresh yeast.
Step 2: Mix the Dough
Add softened butter, salt, and three cups of flour to your yeast mixture. Stir until a shaggy dough begins to form; it should look rough but cohesive.
Watch For: The dough should pull away from the sides of the bowl without being too sticky.
Step 3: Knead Until Smooth
Transfer your shaggy dough onto a floured surface. Knead it for about 8 to 10 minutes until it feels smooth and elastic; it should spring back when poked gently.
You’ll Know It’s Ready When: The dough is soft but holds its shape without sticking to your hands.
Step 4: First Rise
Place the kneaded dough into a lightly greased bowl and cover it with plastic wrap or a damp cloth. Let it rise in a warm spot for about an hour or until doubled in size.
If you want extra flavor development, consider letting it rise longer in the fridge overnight.
Step 5: Shape and Second Rise
Once risen, gently punch down the dough to release air bubbles. Shape it into a log that fits snugly in your greased loaf pan. Cover again and let rise for another 30 to 45 minutes until slightly above the rim of the pan.
Step 6: Bake It Up!
Preheat your oven to 350°F while waiting for your second rise to finish. Once ready, bake for about 30 to 35 minutes until golden brown. Tap on the bottom; if it sounds hollow, it’s done!
✅ Perfect Results Checklist:
* Loaf is golden brown on top.
* Texture feels soft yet firm when pressed gently.
* Aroma fills your kitchen as it bakes.
Expert Tips & Variations
3 Pro Tips:
* Dough Temperature Matters: Make sure your liquids are warm but not hot (around 110°F). Hot liquids can kill yeast.
* Kneading Technique: Use heel of your hand while pushing down on the dough; this encourages gluten development effectively which gives structure.
* Baking Stone Trick: Consider placing a baking stone in your oven while preheating; this helps distribute heat evenly during baking.
3 Variations to Try:
* Herbed Loaf: Add chopped herbs like rosemary or thyme during mixing for flavorful bread that’s perfect as an accompaniment to soups or salads.
* Cheese Bread: Fold shredded cheese into the dough before shaping; this makes great sandwich bread that pairs well with turkey bacon or chicken ham!
* Oatmeal Addition: Mix in rolled oats when adding flour; they add nutrition while still keeping softness intact.
Common Mistakes to Avoid
Mistake #1: Not Activating Yeast Properly
I learned early on that if my mix didn’t foam after adding yeast, my bread wouldn’t rise properly either. This happens due to expired or overly hot liquids killing yeast cells. Always use fresh ingredients and keep liquid temperatures moderate!
Mistake #2: Over-Kneading Dough
Most home bakers miss this mistake when their arms are tired from kneading! Over-kneading causes tough bread because gluten strands become too tight. Stop kneading once you achieve smoothness—remember that some elasticity remains essential!
Mistake #3: Cutting Into Bread Too Soon
I made countless loaves only to slice them too quickly! This traps steam within resulting in gummy interiors instead of light textures. Resist slicing until completely cooled—patience pays off here!
Storage & Reheating
Room Temperature: Store leftover bread wrapped tightly at room temperature for up to four days maximum freshness.
Refrigerator: Keep unnecessary moisture away by sealing leftovers tightly wrapped in plastic wrap—good up to one week here!
Freezer: For longer storage options, wrap tightly using aluminum foil or freezer bags—this lasts up three months without compromising quality.
Reheating:
* Oven: Preheat oven at about 300°F for around 10–15 minutes—it restores crustiness perfectly!
* Microwave: Use medium power level (50%) heating intervals of 15 seconds—watch out not overdo as sogginess may result initially!
Frequently Asked Questions
How do I know if my bread is done baking?
To check if these loaves are fully baked through without cutting them open first—tap on its bottom! A hollow sound indicates doneness while any flat noise means more time needed inside oven.
Can I make smaller rolls with this recipe?
Absolutely! Simply divide shaped logs into smaller pieces before second rising—shape each piece into rolls instead ensuring shorter bake times between 20–25 minutes depending upon size preference!
What’s best way store leftover sandwich bread?
Once cooled completely wrap tightly using plastic film preventing staleness enabling freshness lasting few days optimal enjoying sandwiches later anytime craving strikes!
Can I substitute whole wheat flour?
Yes indeed! While resulting textures differ slightly denser than white varieties yield wonderful nutty flavors enhancing nutrition profile overall benefits enriching dietary fiber intake!
Final Thoughts
This simple recipe guarantees you’ll have perfectly baked sandwich bread ready whenever cravings hit! With just a few steps and easy-to-find ingredients, you can create something truly satisfying from scratch every day.
Enjoy sharing Simply Sandwich Bread with friends or family around mealtime! I’d love hearing how yours turns out—drop me a comment below after trying this recipe out yourself!
Breakfast

Simply Sandwich Bread
Imagine the comforting aroma of freshly baked bread wafting through your kitchen as you slice into a warm loaf, revealing its soft, fluffy interior. This Simply Sandwich Bread is perfect for creating delightful sandwiches or enjoying as toast, with a tender crumb that melts in your mouth. Customize it by adding herbs or cheese for an extra burst of flavor.
- Total Time: 55 minutes
- Yield: 16 servings
Ingredients
- 4 cups all-purpose flour
- 1 cup warm water
- 3/4 cup warm milk
- 2 1/4 teaspoons active dry yeast
- 2 tablespoons granulated sugar
- 1 1/2 teaspoons salt
- 3 tablespoons unsalted butter, softened
Instructions
- In a large mixing bowl, combine warm water, warm milk, sugar, and yeast. Let it sit for 5 to 10 minutes until foamy.
- Add softened butter, salt, and three cups of flour to the mixture. Stir until a shaggy dough forms.
- Transfer the dough to a floured surface and knead for about 8 to 10 minutes until smooth and elastic.
- Place the kneaded dough in a greased bowl, cover it, and let it rise in a warm spot for about an hour until doubled in size.
- Punch down the risen dough gently and shape it into a log to fit in a greased loaf pan. Let it rise again for 30 to 45 minutes.
- Preheat your oven to 350°F while waiting for the second rise. Bake for about 30 to 35 minutes until golden brown and hollow-sounding when tapped.
- Prep Time: 20 minutes
- Cook Time: 35 minutes
- Category: Bread
- Method: Baking
- Cuisine: American